The Roll Call Connect user manual will walk you through setting up Roll Call Connect and using the web interface. This manual assumes you are already familiar with Roll Call. For more information on installing Roll Call, entering people, contributions or groups, see the Roll Call User Manual.
There are several Roll Call Preferences that must be configured to use Connect. To navigate to the preferences area for Connect, do the following:
- Log into Roll Call as Administrator or Director.
- If you are on a Mac, select ROLLCALL> Preferences. If you are on Windows, select Edit>Preferences from the top menu.
- Click on the Connect link of the left sidebar menu.
Roll Call Connect Administrator
The first preference is the Connect Administrator. The Connect Administrator is the user that will manage the look and feel of Connect, what fields will be displayed, and the staff permissions.
To set the Administrators, do the following:
- On the left side you should see an area for Connect Administrators. Click on the +ADD sign underneath that area.
- Enter the Last Name of the Administrator. Pick the appropriate person from the list.
- Click OK in the lower right to save this information.
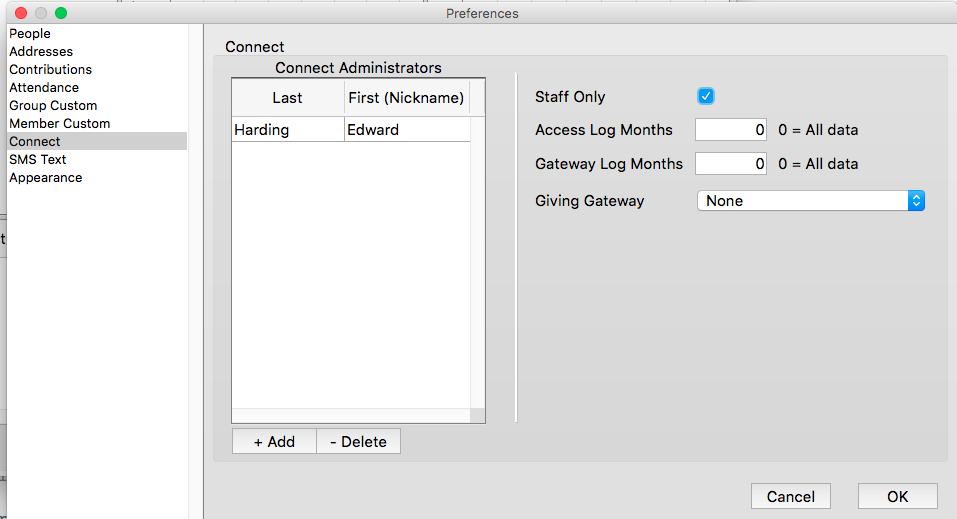
Staff Only
If you only want staff members, not the congregation, to have access to Roll Call information, you’ll need to mark the Staff checkbox to set this preference.
Access/Gateway Logs
Roll Call will record in the access logs each time a person logs into Roll Call Connect. It is up to you to decide how long you wish to maintain those logs. If you leave this preference as 0, access information will never be deleted. If you set this preference to 2 for example, it will keep 2 months of access information.
Giving Gateway
The next preference is necessary if you will be using Online Giving through Roll Call Connect.
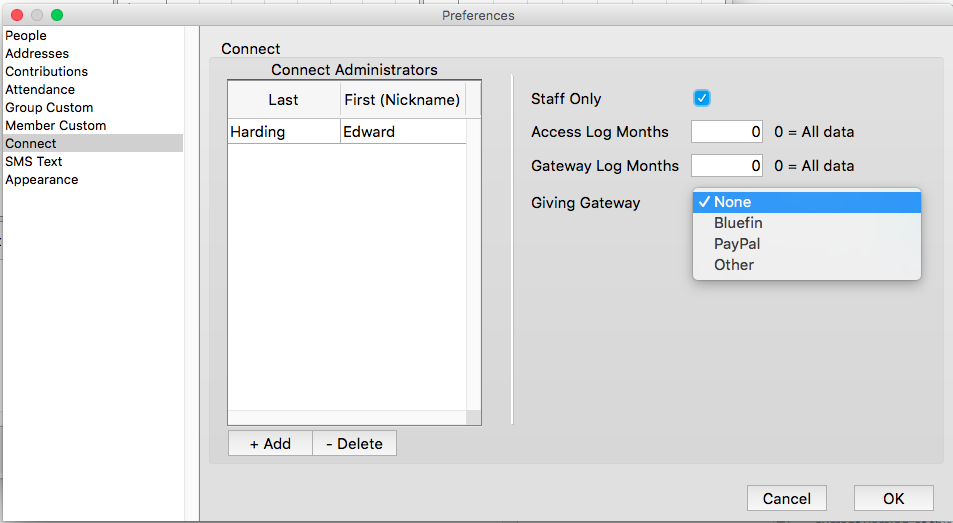
To set up this gateway information, do the following:
- On the right side of the preference window you’ll notice the fields for the Giving Gateway information. Use the drop down to select your churches Online Giving Provider.
- Enter your Gateway Username.
- Enter the Gateway Password.
- Enter the Gateway API Key provided to your church.
- If you will be using the merchant account sandbox to test things out, click on the Sandbox checkbox. Make sure to uncheck this, when you want to go live.
- Click OK to save this information.
Roll Call will also track the people that access the gateway for online giving. It is up to your church to decide how long you wish to maintain this access information. If you leave this preference as 0, gateway logs will never be deleted. If you set this preference to 3, for example, Roll Call will maintain 3 months of gateway logs.